Social
The Complete Guide to LinkedIn Polls
Recently LinkedIn launched its own polls option; where users can create polls to posts. It’s a new way to engage with the LinkedIn audience and understand exactly what they think.
Other Social Media platforms like Facebook, Instagram, and Twitter has already an option to create polls.
Make use of this option to get more relevant insights. Remember you cannot use this feature to ask political opinions, medical information, or other sensitive data.
How can you get started with Linkedin polls?
How can you use them to understand trends and opinions?
In this article, learn how to get started with LinkedIn Polls
Table of Contents
How to Create LinkedIn Polls
Time needed: 5 minutes.
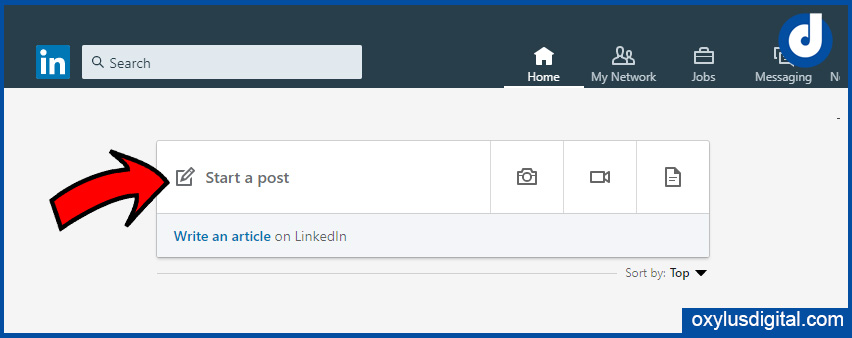
You can create an opinion poll from the LinkedIn homepage itself.
- Click Start a post from the home page.

- Click on Create a poll.
Select Create a Poll option from the post compose window.

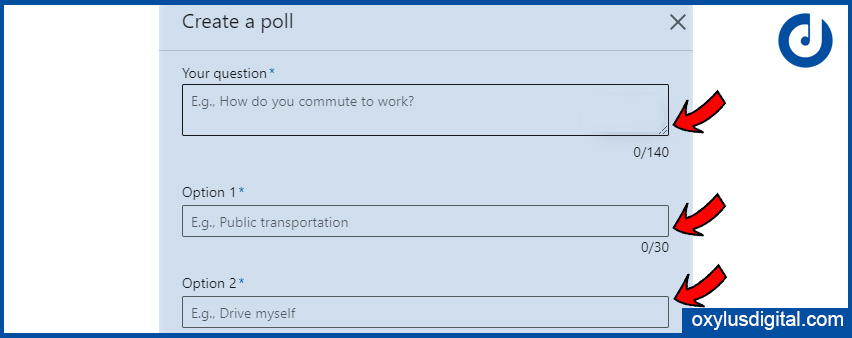
- Type your question and options.
In the Create a poll window you can type your questions and options.
The maximum number of characters allowed Question length is 140.
The maximum length of Poll Option is 30 characters.
There is a minimum of two options.
You can create up to 4 options maximum for a single question.
- Set Poll duration
You can set the poll duration as any of the following options:
1 day
3 days
1 week
2 weeks
- Click Done
- You can add more to content to the post (optional)
Add more content to the post if it is required

- Click on Post button to post the poll
LinkedIn Poll Visibility
You can adjust the visibility and can select who you want to share the poll with.
By default visibility setting will be “anyone,” which means the post will be visible to everyone.
To Adjust Poll Visibility
Click the audience selector next to your profile name.
The default post setting will be Public

Select who you want to share the poll with. Adjust the visibility as you wish.

Anyone – anyone on or off LinkedIn
Anyone + Twitter – If you select this your Polls will be visible to anyone on both LinkedIn and Twitter. To do so first you have to authorize LinkedIn to access your Twitter account.
Note: Only the first 255 characters will be shared to Twitter.
Connections only – only to 1st-degree connections.
Group members – Only visible to members of the selected group
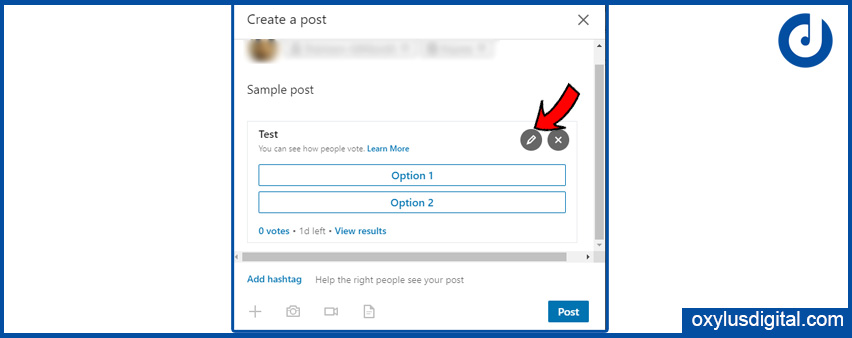
To Edit Poll [Before Publishing]
Click on the edit icon 🖊️ as shown in the picture below and edit the poll if required.
Remember once you published you won’t be able to edit it again.

LinkedIn Poll Duration

Your poll’s duration defaults to one week. You can change the duration of your poll as any of the following:
- 1 day
- 3 days
- 1 week
- 2 weeks
Poll Insights on LinkedIn
The insights are visible to the author of the poll. Which means if you are posted from your account – only you can see the votes.
If polls created via a LinkedIn Page – Vote is visible to all admins of that Page.
If the poll is created in a LinkedIn Group – only the poll author can view the results.
How to View Votes
The author of a poll will be able to view who voted and how each person voted.
A LinkedIn Poll ends between 1 day and 2 weeks after it has been published, depending on the duration set by the author of the poll. The winning choice is shown in Sky Blue along with the percentage of votes. Also, you may receive a notification regarding the result.
To view who voted:
#1. Open the post and and click on the number of votes

#2. From the Votes window – You can view who voted and how each person voted.

Additional Resource: FAQs on LinkedIn Polls
How was your experience with LinkedIn polls? Share your thoughts and reviews through comments!


1 Comment